
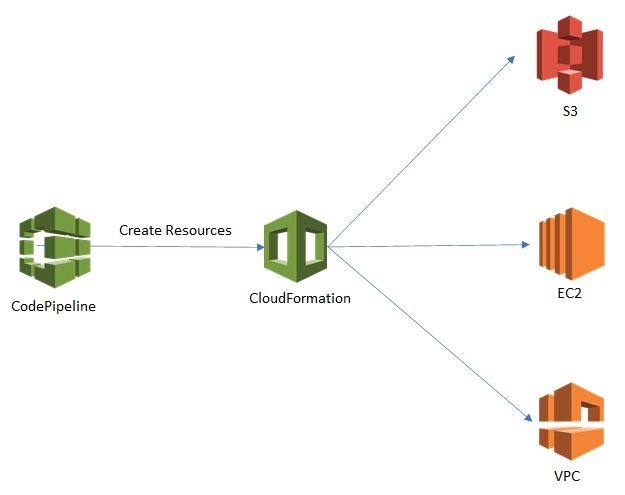
This guide is to enable you to use CodePipeline to deploy CloudFrormation Stack (EC2 instance in a predefined VPC).
Step 1: Create CloudFormation Template
The following CloudFormation template will let you create a t2.micro EC2 instance in a public subnet inside a pre-created VPC.
- Save the following yaml configuration as a template DemoCloudFormationTemplate.yaml
- update VPC Id with your VPC ID (Go to VPC console and copy the VPC ID or create a new VPC )
- update Subnet Id with your Subnet ID (Go to VPC console, select Subnets from left panel and copy the Public Subnet Id or create a new Public Subnet in the VPC to use)
- Edit the SSHKeyname with your Key Pair. - Zip the file as DemoCloudFormation.zip (CodePipeline only takes the CloudFormation in .zip format from S3)
- Upload the zip file to the S3 bucket of your choice for example S3://DemoCloudFormation/DemoCloudFormation.zip
Make sure versioning is turned on for the Bucket.
AWSTemplateFormatVersion: '2010-09-09'
Description: Template to Create an EC2 instance in a VPC in us-east-1a region

Parameters:
  ImageId:
    Type: String
    Description: 'Amazon Linux 2 AMI for us-east-1a region'
    Default: 'ami-0742b4e673072066f'
  VpcId:
    Type: String
    Description: VPC id
    Default: vpc-xxxxxxxxxxxxxxx
  PublicSubnetId:
    Type: String
    Description: Subnet in which to launch an EC2
    Default: subnet-xxxxxxxxxxxxxx
  AvailabilityZone:
    Type: String
    Description: Availability Zone into which instance will launch
    Default: us-east-1a
  InstanceType:
    Type: String
    Description: Choosing t2 micro to start with free tier
    Default: t2.micro
  SSHKeyName:
    Description: SSH Keypair to login to the instance
    Type: AWS::EC2::KeyPair::KeyName
    Default: Demo-EC2-KP

Resources:
  DemoInstance:
    Type: 'AWS::EC2::Instance'
    Properties:
      ImageId: !Ref ImageId
      InstanceType: !Ref InstanceType
      AvailabilityZone: !Ref AvailabilityZone
      KeyName: !Ref SSHKeyName
      NetworkInterfaces:
        - DeviceIndex: '0'
          AssociatePublicIpAddress: true
          DeleteOnTermination: true
          SubnetId: !Ref PublicSubnetId
          GroupSet:
            - !Ref DemoSecurityGroup

  DemoSecurityGroup:
    Type: 'AWS::EC2::SecurityGroup'
    Properties:
      VpcId: !Ref VpcId
      GroupDescription: SG to allow SSH access via port 22
      SecurityGroupIngress:
        - IpProtocol: tcp
          FromPort: 22
          ToPort: 22
          CidrIp: '0.0.0.0/0'
      Tags:
        - Key: Name
          Value: DemoStack

Outputs:
  DemoInstanceId:
    Description: Instance Id
    Value: !Ref DemoInstance
Step 2: Create Service role for CodePipeline
Next step is to create a service role for the CodePipeline to access the S3 buck, deploy CloudFormation, Some OpsWork, Lambda Invocation etc.
- Go to IAM / Roles and click on create role.
- Here it gets tricky as there is no CodePipeline so select EC2 and we will change it to CodePipeline later.
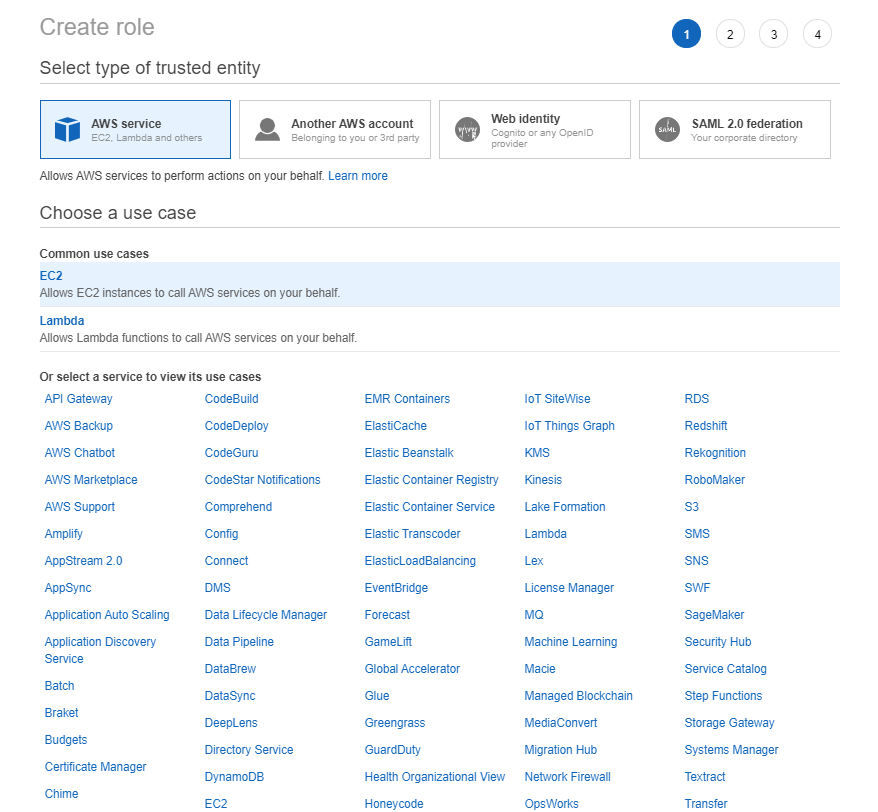
- Click Next: Permissions. Do not add any permissions yet and click Next: Tags and create any tag if required
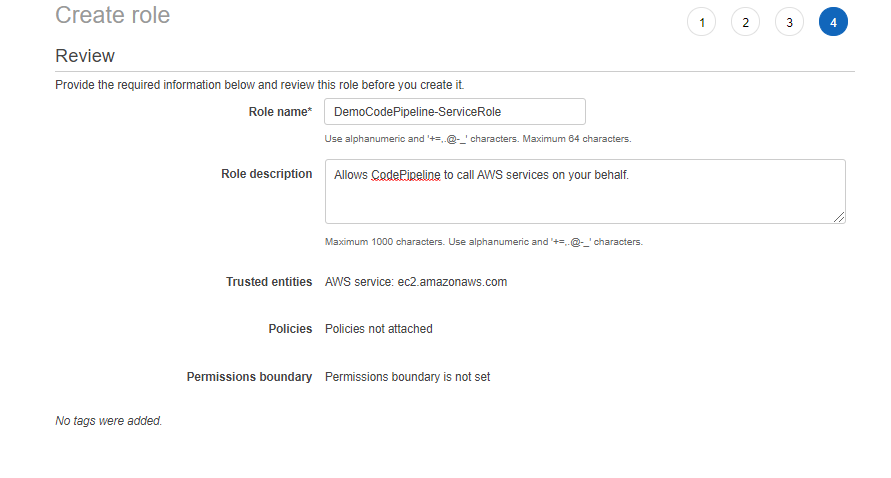
- Click Next: Review, Give a name to the role for eg. DemoCodePipeline-ServiceRole. Change the description to describe the role. Click on Create Role
- Now go back to Roles and search for newly created Role "DemoCodePipeline-ServiceRole". Click on it to edit the role.
- Add the following as an inline policy and save it.
{
"Statement": [
{
"Action": [
"s3:GetObject",
"s3:GetObjectVersion",
"s3:GetBucketVersioning",
"s3:PutObject"
],
"Resource": "arn:aws:s3:::codepipeline*",
"Effect": "Allow"
},
{
"Action": [
"codedeploy:CreateDeployment",
"codedeploy:GetApplicationRevision",
"codedeploy:GetDeployment",
"codedeploy:GetDeploymentConfig",
"codedeploy:RegisterApplicationRevision"
],
"Resource": "*",
"Effect": "Allow"
},
{
"Action": [
"ec2:*",
"cloudwatch:*",
"s3:*",
"sns:*",
"cloudformation:*",
"sqs:*",
"sqs:*",
"ecs:*",
"iam:PassRole"
],
"Resource": "*",
"Effect": "Allow"
},
{
"Action": [
"lambda:InvokeFunction",
"lambda:ListFunctions"
],
"Resource": "*",
"Effect": "Allow"
},
{
"Action": [
"cloudformation:CreateStack",
"cloudformation:DeleteStack",
"cloudformation:DescribeStacks",
"cloudformation:UpdateStack",
"cloudformation:CreateChangeSet",
"cloudformation:DeleteChangeSet",
"cloudformation:DescribeChangeSet",
"cloudformation:ExecuteChangeSet",
"cloudformation:SetStackPolicy",
"cloudformation:ValidateTemplate",
"iam:PassRole"
],
"Resource": "*",
"Effect": "Allow"
},
{
"Action": [
"codebuild:BatchGetBuilds",
"codebuild:StartBuild"
],
"Resource": "*",
"Effect": "Allow"
}
],
"Version": "2012-10-17"
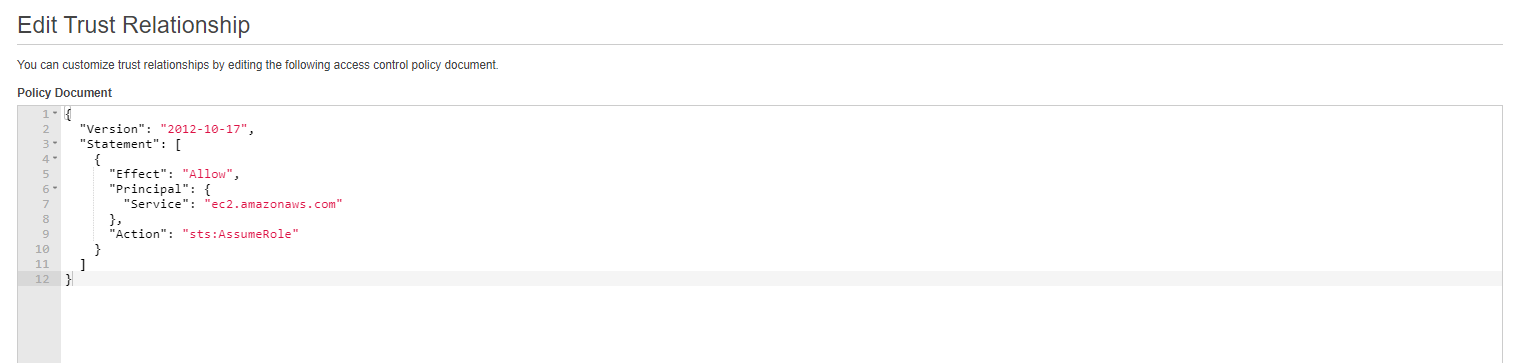
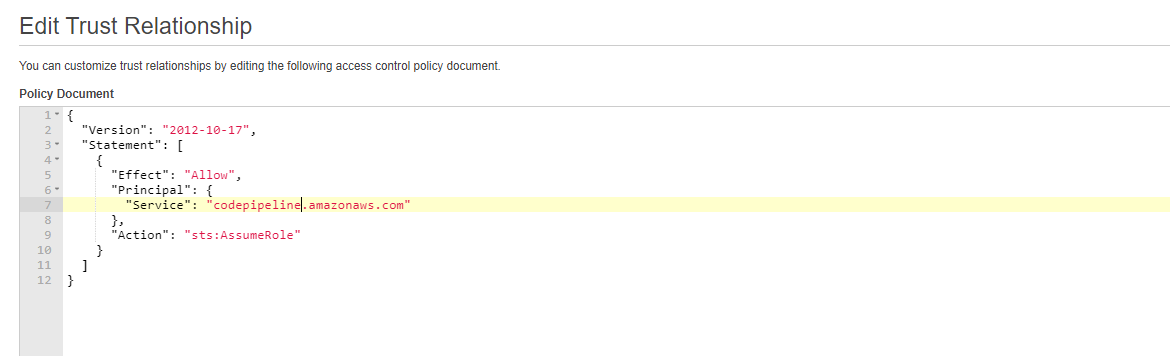
}- Go to Trusted Relationship tab and click on edit trust relationship to change EC2 to codepipeline. You are done with creating a custom CodePipeline Service Role.
Step 3: Create Service Role for CloudFormation
Next step is to create a service role for the CloudFormationto to access the S3 bucket and deploy the EC2 instance in a VPC.
- Go to IAM / Roles and click on create role.
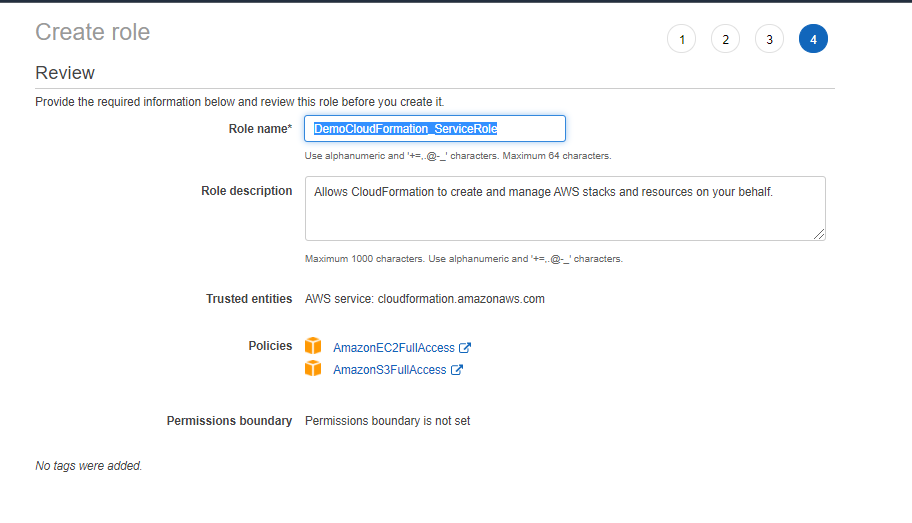
- Select CloudFormation and click Next: Permissions
- check AmazonEC2FullAccess and S3FullAccess. This is overly permissive so change it according to your restrictions
- Click Next:Tags, create tags if required, click Next:Review and give the Role a name "DemoCloudFormation_ServiceRole". and click Create Role. Now you are done with all the leg work.
Step 4: Create CodePipeline to deploy CloudFormation Stack
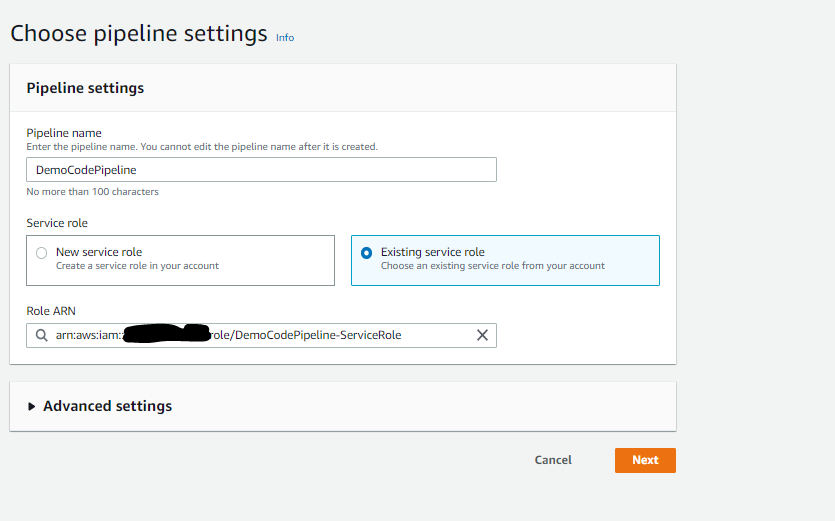
- Go to Codepipline Console and click on Create Pipeline
- Give the pipeline a name. Select Existing Service Role. From the dropdown Role ARN select the newly created custom code pipeline role "DemoCodePipeline-ServiceRole" and click Next
- In source provider dropdown, select Amazon S3
- Select the bucket name as defined in Step 1 - "DemoCloudFormation"
- For S3 object key type the .zip file name as described in Step 1 "DemoCloudFormation.zip". Click Next
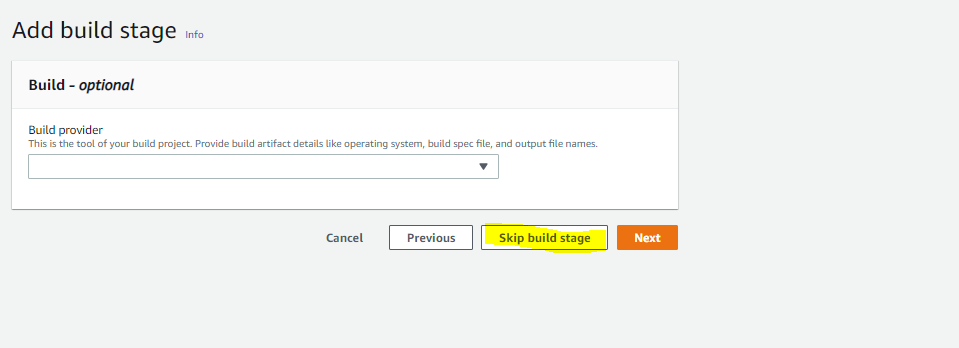
- Skip the next build stage as we are not going to build any code
- In Deploy Provider drop down menu select AWS CloudFormation
- Action Mode - Create or Update a stack
- Since we are creating a new stack give it a name for eg. "DemoCloudFormationStack"
- Select SourceArtifact as Artifact name
- IMPORTANT: Write File Name as the template name which you have created in step 1 "DemoCloudFormationTemplate.yaml"
- Add role name as the role you have defined in Step 3 "DemoCloudFormation_ServiceRole"
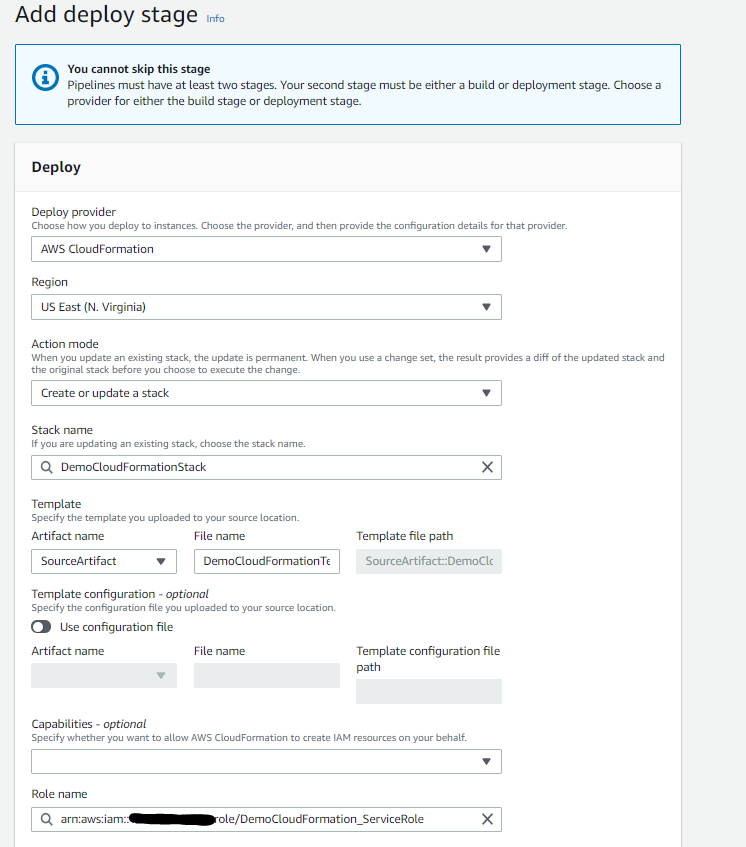
- Click Next and create pipeline
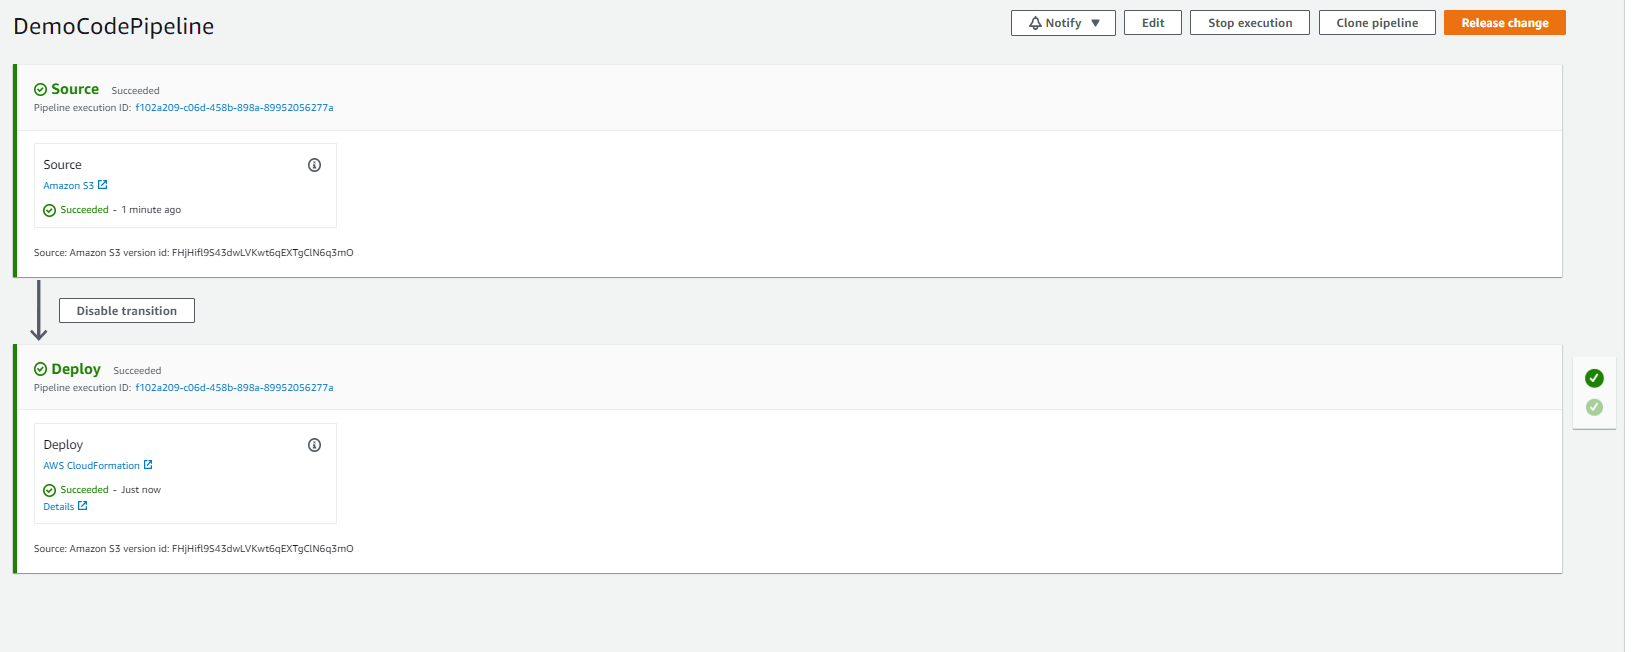
- Voila you are done. This will kick off two stage code pipeline.
Stage 1: Source - where it reads the CloudFormation Template from S3
Stage 2: Deploy: where it deploys the EC2 instance as defined in the CloudFormation template.
- Go to CloudFormation console and go to Events to check the status.

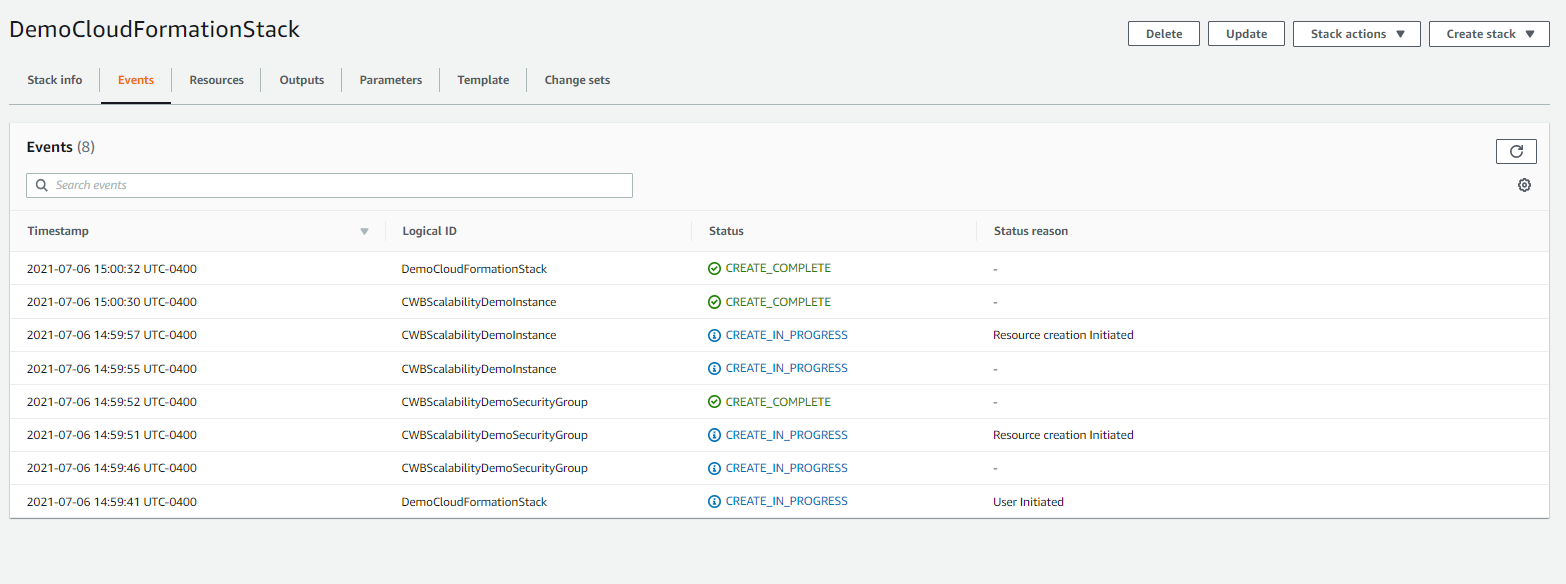
- Go to EC2 console to verify if the t2.micro EC2 instance is created
